| Reloading Blackpowder Shotshells with Antique Tooling ¢ No 3
by Red Sun SASS#635
Welcome back to this series of articles. This month we'll
cover some historical tidbits, priming the hull, and the components that
will be loaded. Well close with a series of photos showing the tools we'll
use for the loading process. Now let's get started with some of the priming
tools that were around back then and the one that will be used for priming.
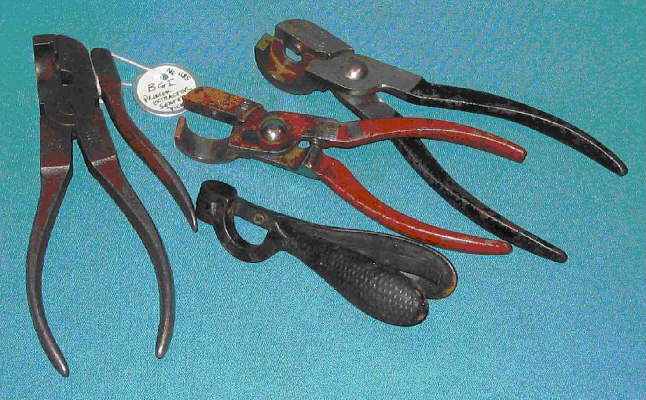
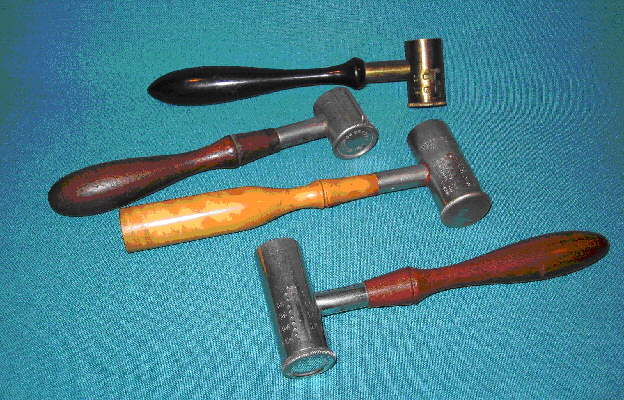
Last month, we showed a few priming tools (cappers and
decappers) that were considered ōbench topö styles. Below are some of the
more rudimentary ōclampö configurations.
The tools pictured are (L-R) BGI (Bridgeport Gun Implement
Company) Berdan primer tool, unmarked clamshell priming tool, and 2 BGI
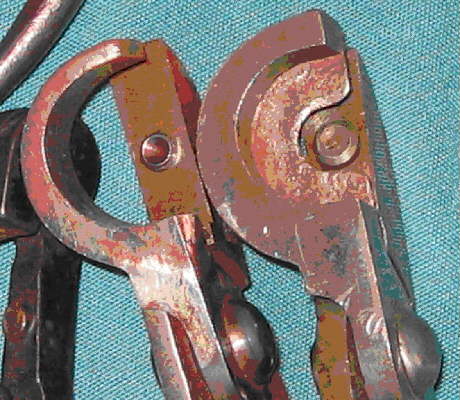
priming tools. Below is a detail of the 2 BGI tools and their differing
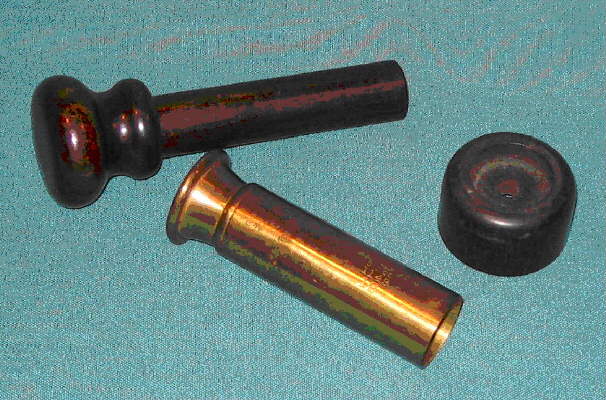
priming post diameters.
As you can see, the differences are significant. We will
use the larger black handled tool for seating the 209 primer of our shotshell
hull. This larger post will safely support the base of the modern battery
cup design for our purposes. The process is shown below.
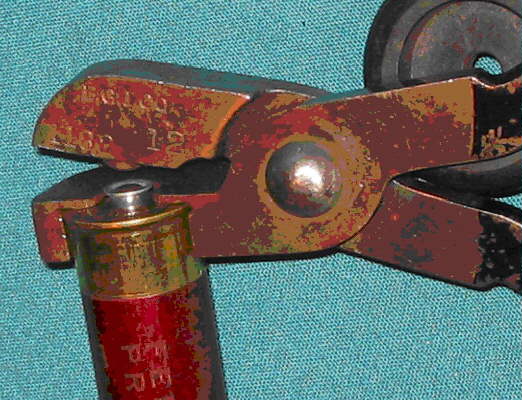
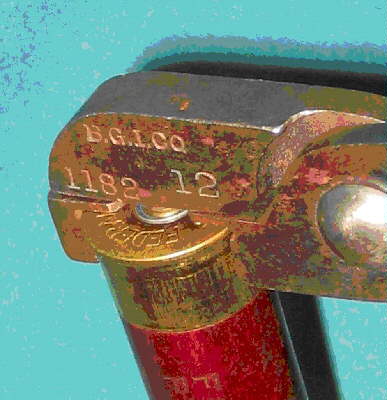
Now that we have the primer installed with this tool,
let's take a look at some of tools that will be used to measure and dispense
the powder and shot. Shown below are a few types from that vintage era.
Most of these powder and shot ōdippersö as they were sometimes
referred to were dual purpose since the standard rule of thumb with black
powder was equal volumes of powder to shot. Below is a close-up of the
graduations on one of them. Most of these tools had markings for both powder
and shot. Powder indicated in Drams and Shot in ounces (oz). The one pictured
below shows the graduations. These were simply adjusted by the ōCup Baseö
where one would twist the marker out of the indentation and slide the internal
cup in or out.
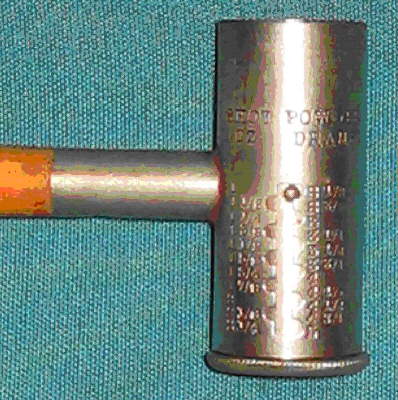 |
Shot and Powder Graduations
Adjustment Marker
Cup Base
|
We plan to use this with the settings at 1 oz of shot
and 2 ½ Drams of powder. The powder weight equivalent is approximately
60-65 grains by weight.
Next we have the tools used to support the hull and pack
the components once they're dispensed. You've probably seen some of these
so-called plunger and funnel tools and thought about how they were utilized.
The actual name for these tools as a group is called the ōBarclay Loaderö.
Below is a set offered by BGI that we'll be using.
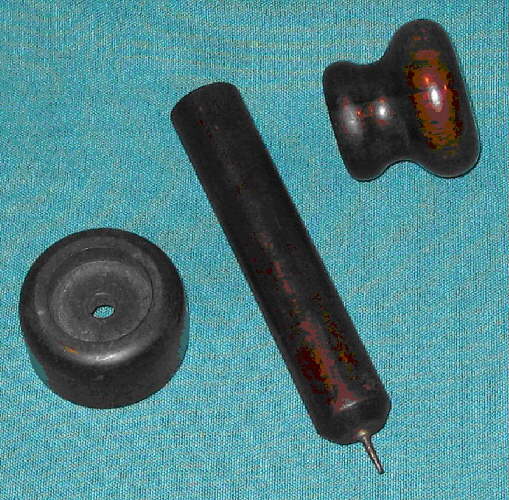
The tool set is comprised of the Plunger unit that can
also be reconfigured as a primer de-capper. The post is simply twisted
out and reversed on the handle. This is shown below.
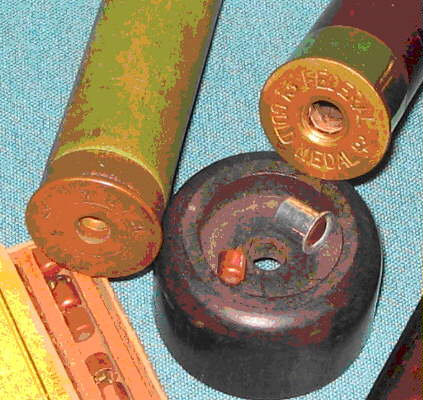
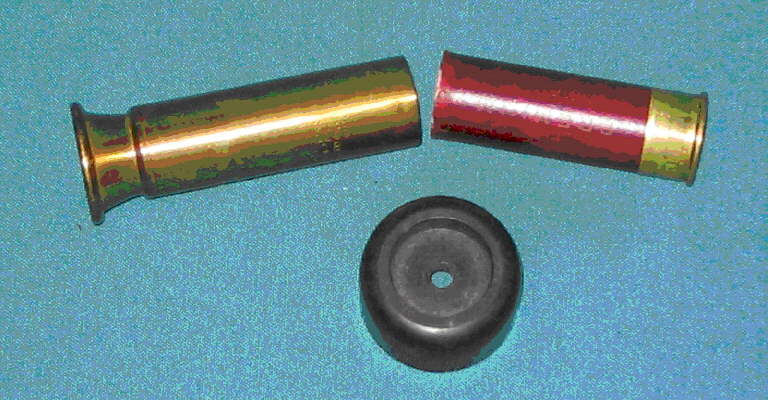
If you're wondering what that hockey puck was for, it
used to support the base of the hull during the decapping process. The
photo to the right shows a vintage hull and a primer that would be supported
by this tool. Notice the size of the hole and the primer itself compared
to the conventional 209 primer of today. Also, you'll see how much smaller
the decapping pin is in the post. These were intended for the earlier vintage
primers that were quite a bit smaller than the conventional battery cup
configuration used today.
In preparing for the component loading, we'll insert the
hull into the funnel and place it on the base.
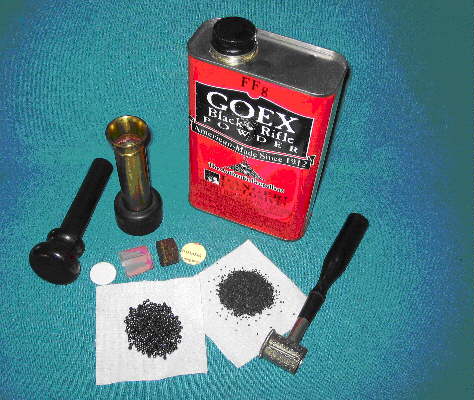
Now we'll gather the components that we'll use and the
sequence to how they will be installed. Below is the whole ensemble of
the items. The shot cup is the remaining cup portion of a Winchester 1
oz wad with the spring base and gas seal cut off. We also have a punched
milk carton card and a fiber wad/seal that replaces the spring and gas
seal cut off from the plastic wad. And last, there is the over-shot card
that's need prior to the roll crimping. The powder and shot are shown in
their ōdumpedö piles for illustration.
So with the hull installed in the funnel, we can start
loading each of these components. Next month we'll have a series of photos
showing the loading of these components and the final roll crimping of
the shotshell.
In the meantime, your comments and suggestions are welcome.
Please forward those to Redsun635@aol.com.
Happy Reloading,
Red Sun
|