| New Ballast Safety Tank.
After the last outing, the Skipjack is on my kitchen table disassembled.
Was looking for a leak that almost claimed my boat.
Turns out, the leak was caused by me not following the pre run check
list.
I had not run the ballast tank water pump in both directions.
Most of all, I did not empty the ballast balloon completely before
closing of the Schreader valve.
Pumping water in worked fine.
Pumping water out worked fine up until the balloon reached it's pre
run state. Partly inflated.
As the pump removed the remaining air from the balloon, it pulled a
negative pressure in the cylinder.
This was enough to pull water in through the propeller shaft seal.
Making changed to the Safety tank has nothing to do with what I caused.
While the boat and it's parts are sitting on the kitchen table, I wondered
if I could find a better water pump.
The 3 minutes it now takes to fill and empty the ballast balloon is
too long.
So, I searched for a new pump.
Ordered one and I am waiting for delivery.
Using the measurement numbers, I will have to make some changed to
the tech rack.
Remove the water pump and decide once the new pump gets here, whether
to put in at the back of the tank to in front of the tank.
Another issue is the battery. It currently sits under the safety tank
which looks sort of like a "C" with the opening down that lets the battery
slide under the tank.
Looking at the tech rack, it looked like I could move the battery under
the rack once the water pump is removed.
Might have to relocate 1 servo.
Need the pump.
Now, with the battery moved, I could/can make the safety tank by making
2 water tight bulkheads with breather holes to equalize the cylinder pressure.
By using bulkheads, this will shorten the safety tank by as much as
1" or more.
More room in the cylinder for stuff.
Okay, think I will make the 2 bulkheads.
Found a piece of 5/16" clear plastic laying around the shop.
Put my short test cylinder piece over the plastic and scribe the circles
needed.
Drill a 1/4" hole in center of pieces.
Put a bolt through and chuck it in the drill press.
Turn the circles to fit inside the cylinder.
Get out my Exacto knife, a couple of small files and a steel cutter
I made for making grooves for O-rings.
15 minutes later, I had 2 bulkheads ready for the cylinder.
Test fit the bulkheads in to the short cylinder piece and I think I
have what I want.
I put three 1/16" holes in each bulkhead to allow pressure to be passed
to the entire cylinder when the balloon is inflated.
Once I have the new water pump, I will need to make an inlet tube that
will hold the balloon in place and handle that the water flow rate. (thinking
1/4" brass tube and plastic parts.
I will also need to make something to keep the bulkheads separated so
they can not move in or out.
Thinking 1/16" brass rods and wheel collars on both sides of each bulkhead.
This will allow me to adjust the length of the safety tank as needed.
This is the original ballast safety tank with it's parts and balloon.
I have since gone to a larger balloon (24") that when filled, does
not put pressure on the balloon rubber but just fills it out.
There is no pressure trying to empty the balloon when filled.
Had the issue with the smaller balloon. (15")
The tube holds the balloon so it does not bunch up.
The new one will be larger. (this one is 1/8" tubing)
This morning,
I tested the new water pump against the old water pump.
===================================
The Test.
Time to pump 450 ml when pump motor is connected directly to the 7.4
DCV (2650 mah) battery.
Original roller pump = 194 second.
New pump = 19 seconds in clock wise rotation.
18 seconds in count clock wise rotation.
19 seconds is perfect!
There is an issue I need to find a fix for.
The New pump is a gear pump and it will NOT seal completely and water
will flow back through the pump when not running.
I need some sort of small electric off/on valve.
Any and all suggestions would be appreciated on where to find a small
electric off/on valve.
=============================
Warning..........
When testing this little pump, I sued the kitchen sink.
I was not careful the first time on pointing the exit fitting.
I did not put a length of hose on it but just let the outlet do it's
thing.
This little pump shot water at least 8' across the room to the cabinets.
Had to do a quick wipe down of the cabinets and floor.
This pump put about 1/3 cup of water out before I got control and pointed
the pump outlet in to the sink.
Note to self . . .when testing water pumps, make sure to use 2 lengths
of hose to direct the water from the container to the sink.
About the pump.
I bought 2.
1 to disassemble to see if I can put a brushless motor on it.
1 to test and run as is.
My total cost delivered to my mail box in town was $8.64 including shipping.
====================================
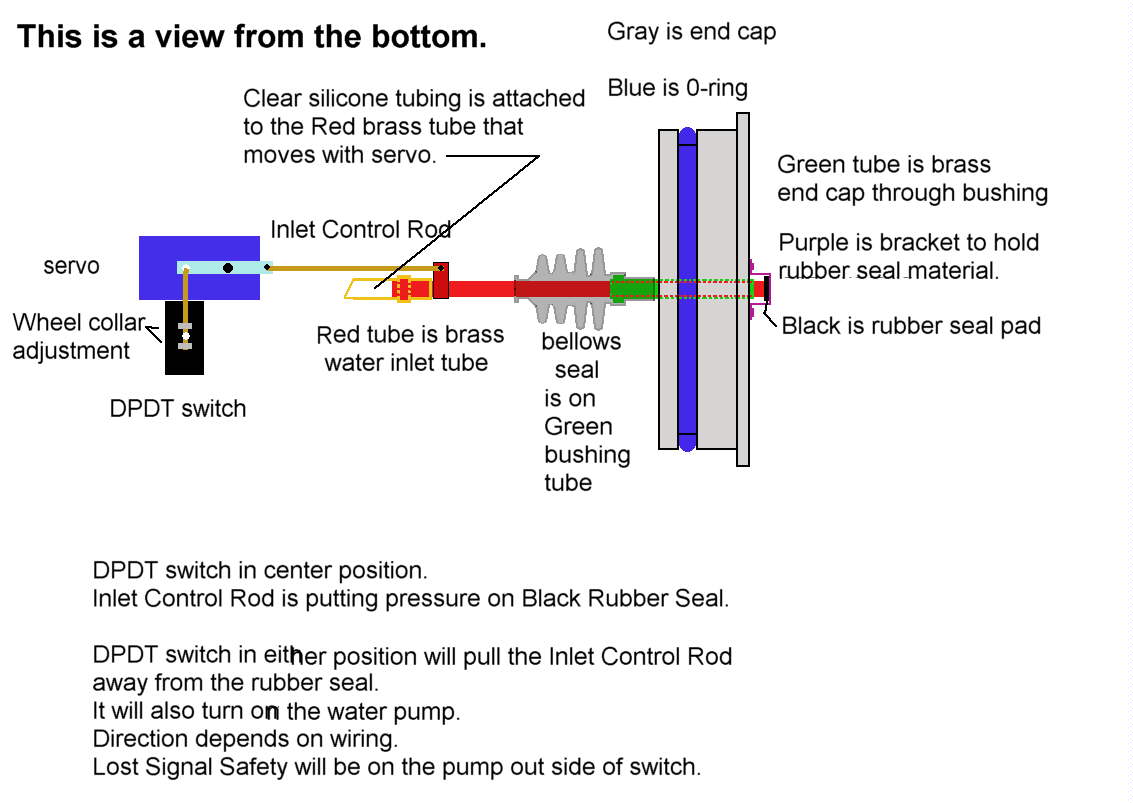
Inlet water valve.
This is one possible solution.
==================
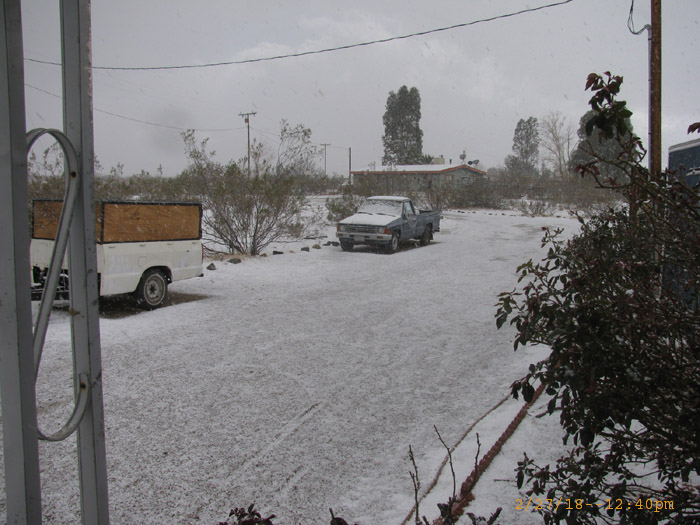
Work in shop has been suspended for today.
It has been raining hard for 2 hours and it has just turned to snow.
I am going inside the house.
It's time for lunch anyway.
Doubt I will be coming back out to the shop.
|