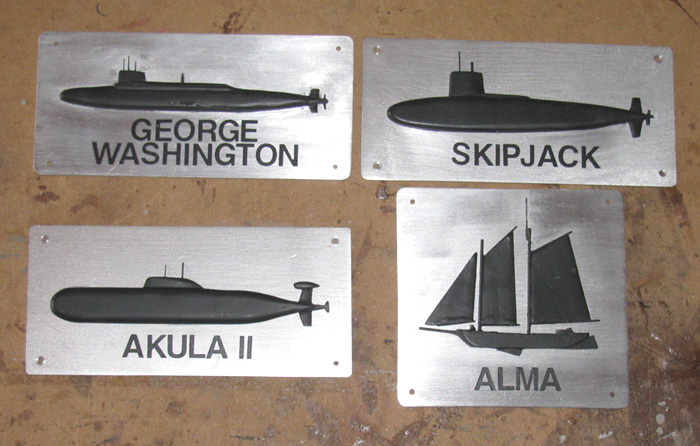
| I thought I would make some ID badges for the transportation boxes.
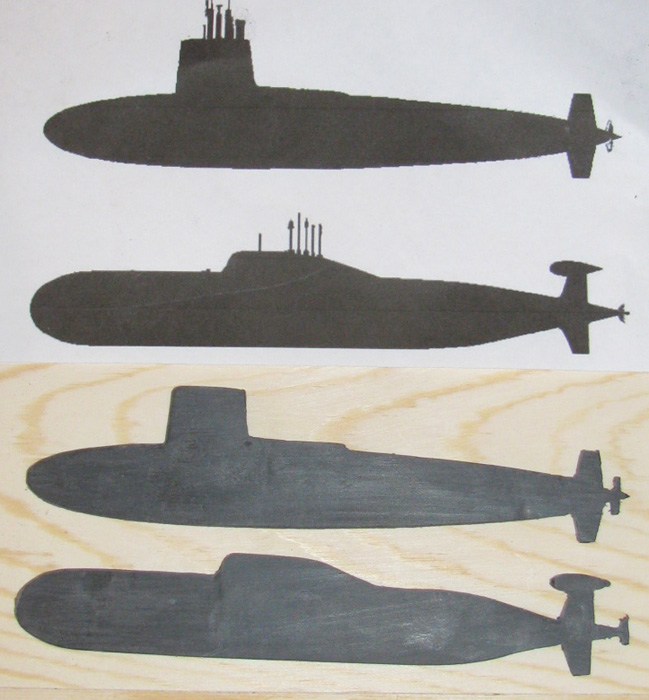
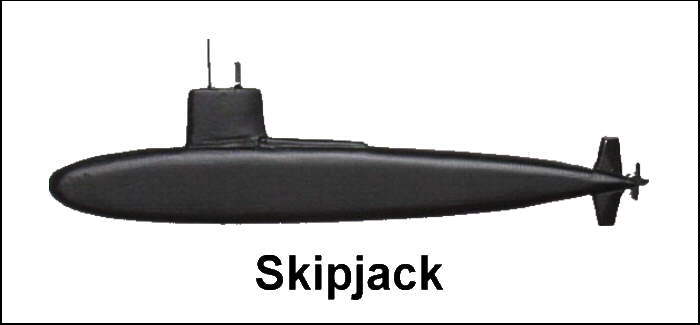
Figure I need a Skipjack and an Akula II badge.
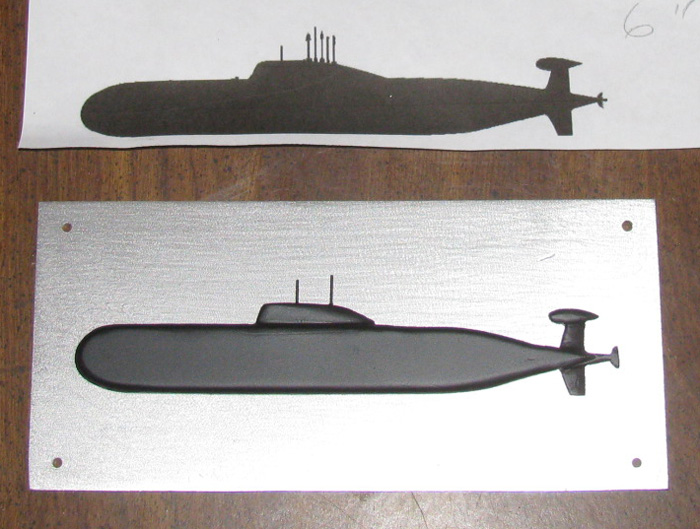
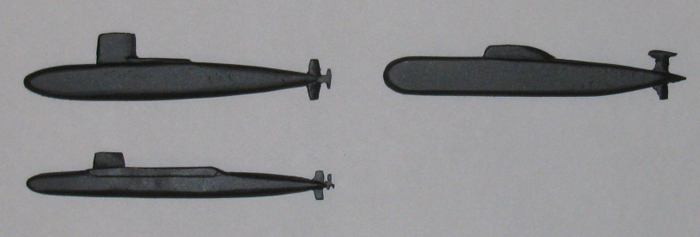
Make some silhouette of the 2 boats.
Made them in 3 different sizes.
5.75", 6.00 and 6.25"
Why, because there seems to be a difference from my software to my
printer.
The first 6" printout was 5.75" and not 6".
It may have been me and where I measured from.
I wanted from bow to propellor to be 6".
I might have grabbed from bow to end of propellor cone.
Anyway, I got what I wanted printing out the 3 options.
====================================
First thing to do was cut 4 - 1/16" pieces of sheet plastic.
Glue 2 pieces together to get 1/8" thick pieces.
Did that and clamped them together to cure.
I made 2 silhouette of each boat of each size.
I glued a drawing to each piece of plastic.
Using my Dremel and a thin grinding wheel, I started hand shaping the
plastic, cutting close tot he lines but not to the lines to start.
Then I slowly got closer to the lines.
They are not perfect but they are so small, I think this will do.
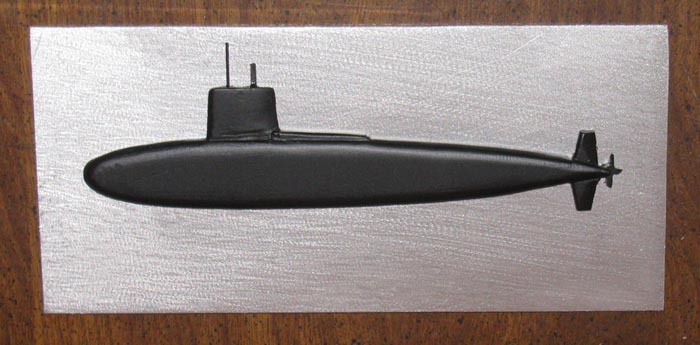
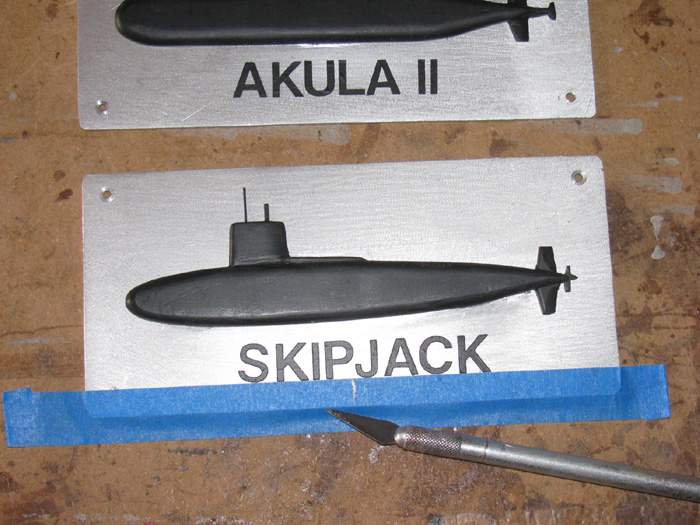
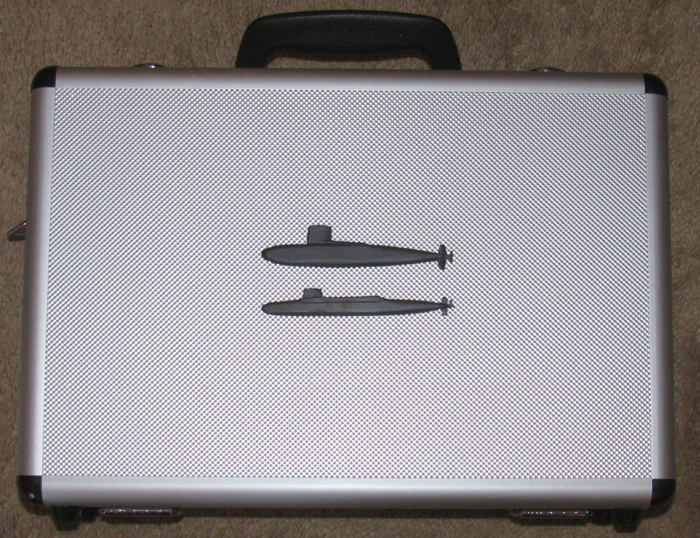
This is the Skipjack badge.
In the photo, I can see a little more work on cleaning it up.
Skipjack badge next to ruler showing 6" long.
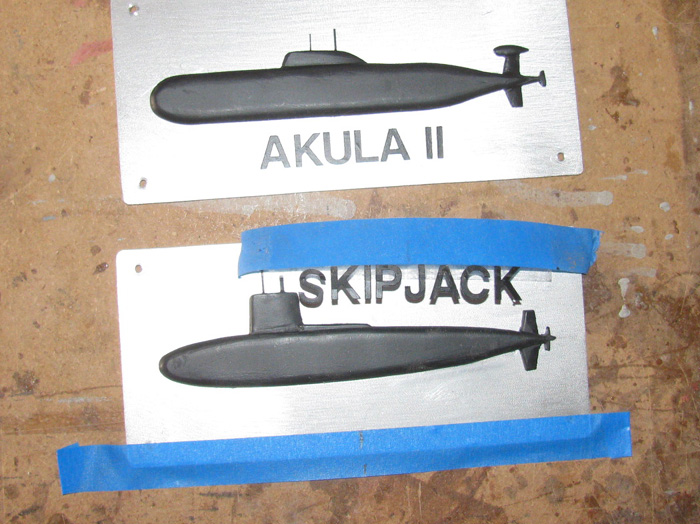
Here are both the Skipjack and Akula II badges.
Both ready for clean up.
I plan to put a couple of masts on each.
Not all of them but 2 I think will do.
I have some .028" piano wire that should do the trick.
Originally, I thought I would put these on the sides of the transportation
boxes.
I am leaning that way because the badges would tell me which way the
boat goes in the box.
But, I will place them on the top and take a look.
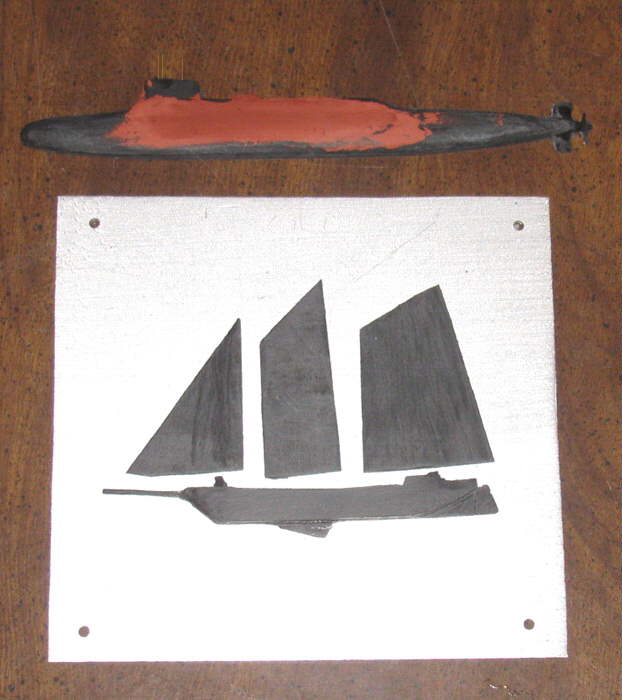
Thought I would see about making the emblem a little ore 3D.
I cut a piece of sheet plastic after scribing the hull on to it.
Cut it out and then worked on it with a 1/4" Dremel sanding drum.
Rounded the hull sort of.
Shaped it to the original hull.
This leaves the sail and exhaust fairing recessed back.
I then glued the piece to the original.
After it cures, I will continue shaping the hull a little more round.
I will also see if I can round the front of the sail and tear drop
the rear of the sail.
Maybe even the rudders.
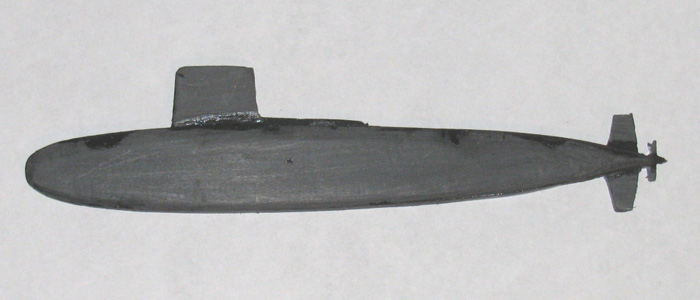
View straight on showing the shaping.
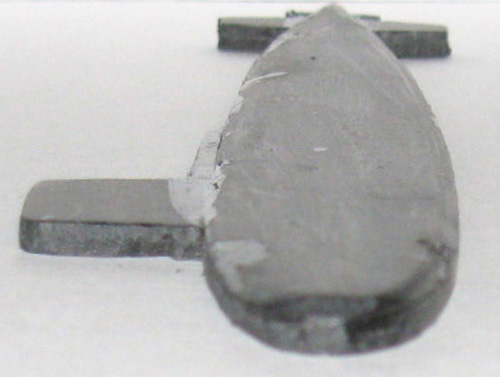
Did some shaping with file and Exacto knife.
Actually used the knife to scrape the edges down.
Hull shaped.
Sail shaped.
Rudders shaped.
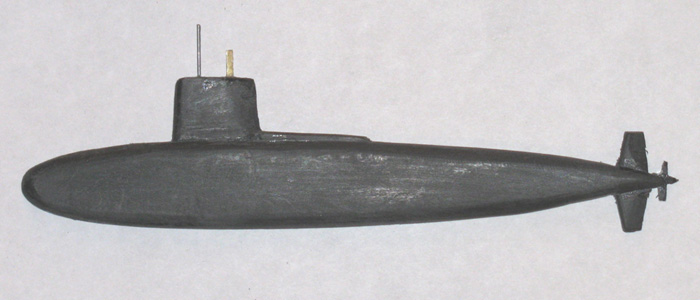
Mast made and installed in grooved made in the back of the sail.
I think I will stop here. I like it.
Still need to look for the aluminum sheet to make a back plate.
Silhouette has been painted flat black.
I cut an old speed limit sign to get the aluminum back ground.
Contrary to the photo, the aluminum is square on all corners.
I need to get some small bolts and then I think I might round off the
corners of the backing plate.
I have some clear label paper that I think I might print the name of
the boat and put on the aluminum below the silhouette to ID the boat.
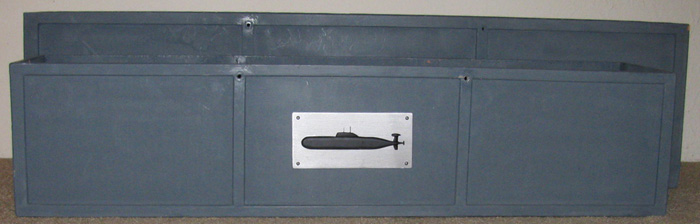
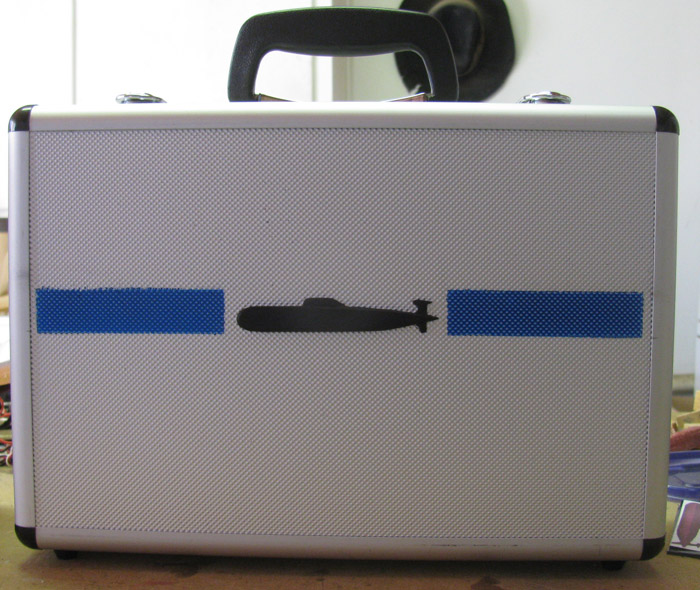
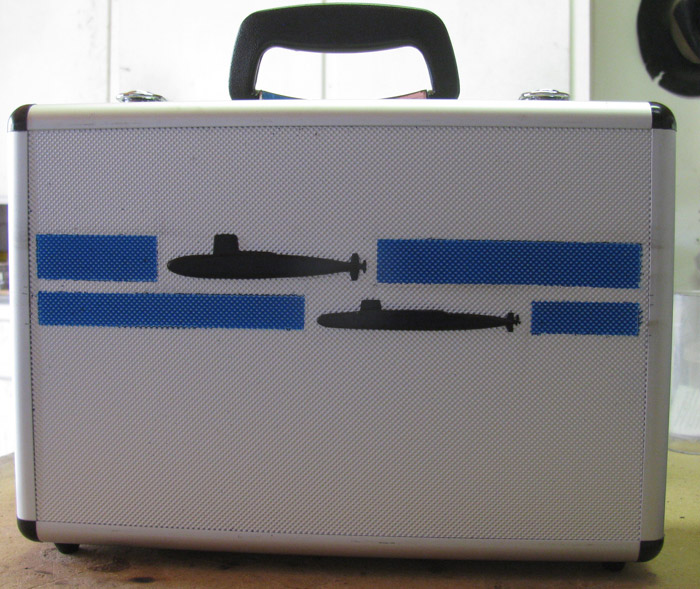
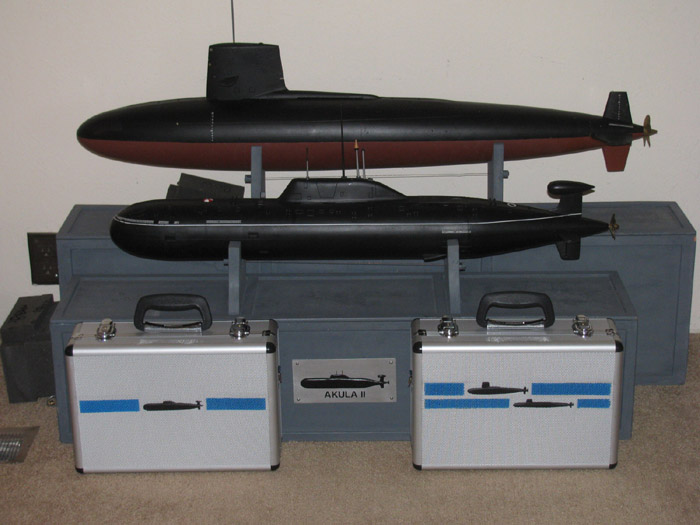
I decided to mount the emblem on the side of the box.
This tells me which way the boat is in the box.
The backing plate is mounted with 4 stainless bolts.
The plastic emblem is temporarily mounted using 3 small spots of silicone.
If I want to add the name, I can remove the emblem and adjust placement.

====================================
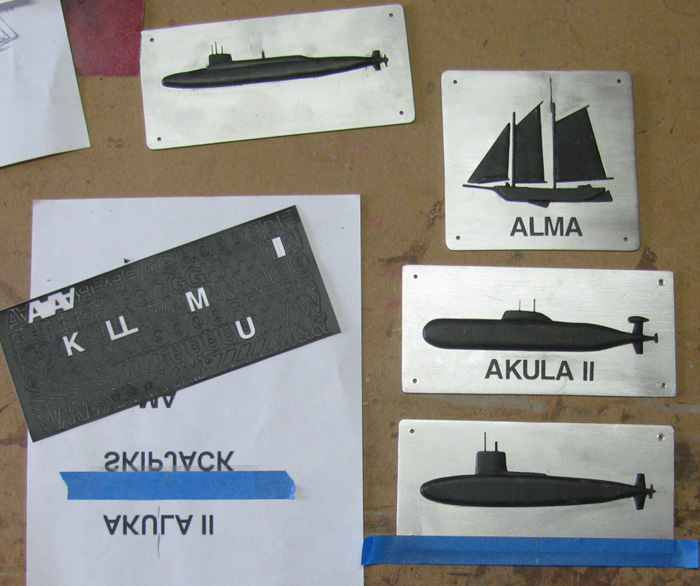
Akula II emblem.
Today, I sat down and did the shaping of the 3 pieces of sheet plastic.
I bonded them 1 at a time and shaped again.
The rudders and rudder bulb were a bit of a challenge but nothing that
taking my time could not conquer.
3 layers of plastic and this is what I ended up with.
I may round the hull a little more now that I see the photo.
The boat is just sitting on the aluminum back plate at this time.
Here is a mock up of what I had in mind.
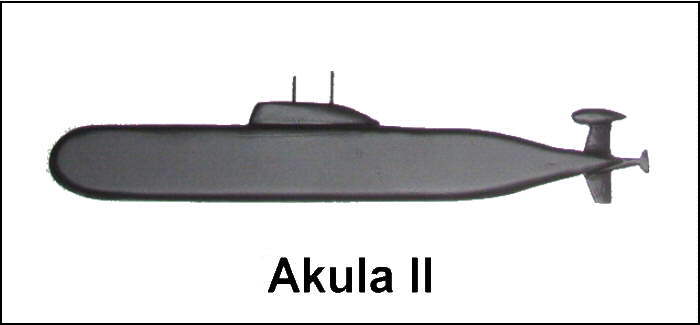
Akula II emblem installed on the box.
I started on the George Washington and the ALMA emblems.
GW plastic work is complete but I wanted a better line for the lower
missile deck edge. so I glazed it and will file it in.
It was not bad, just a couple of scribe lines I did not want to show.
The ALMA hull is near complete and I have started on the sails.
Next will be the masts and booms.
I also have to put a few standing rig lines on this.
I have a plan.
I have lots of this aluminum that I am making the backing out of.
I am going to take a small piece and scribe some lines on it.
Then I will spray it flat black.
Once it dries, I will sand the plate again, hoping to leave the lines
on the plate.
(can't hurt to try)
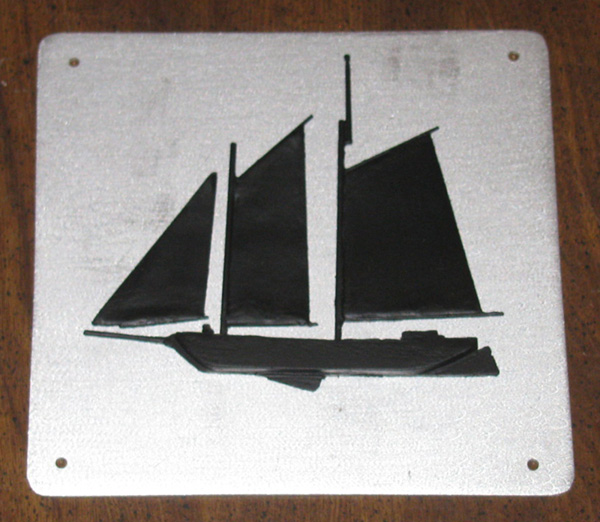
Still working on the ALMA emblem.
I did the testing of scribing lines on an aluminum plate and then sanding
the paint off the plate.
Looks okay but made the emblem look cluttered.
I have decided for now, not to put the running rig lines on the emblem.
Here are the ALMA parts sitting on the backing plate.
I like this look but I need to correct 1 item.
The printed drawing patterns where printed with the hull facing right.
The emblems need to face left.
So, as I assembled the parts, I was using one of the drawings facing
the wrong way.
Looking at the photo, I can see I installed the top mast on the wrong
side of the main mast.
Should be on the front side of the mast.
Oooops.
I will fix that tomorrow.
I need to let the glues and paint cure completely before trying to
correct this.
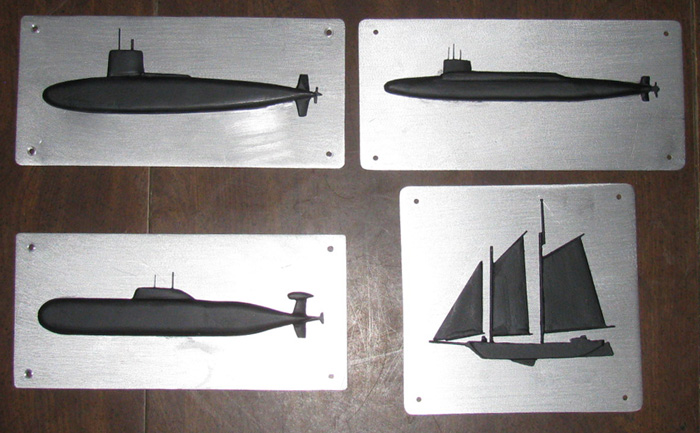
I also finished the George Washington emblem.
Even mounted it on the backing plate.
It is out in the shop, letting the paint cure before I handle it.
Had a thought and will see if it works.
I was thinking of having a missile about half way out of one of the
tubes.
The part will be small.
I can add this any time.
The four emblems I have been working on.
The ALMA will be fixed and mounted later this morning.
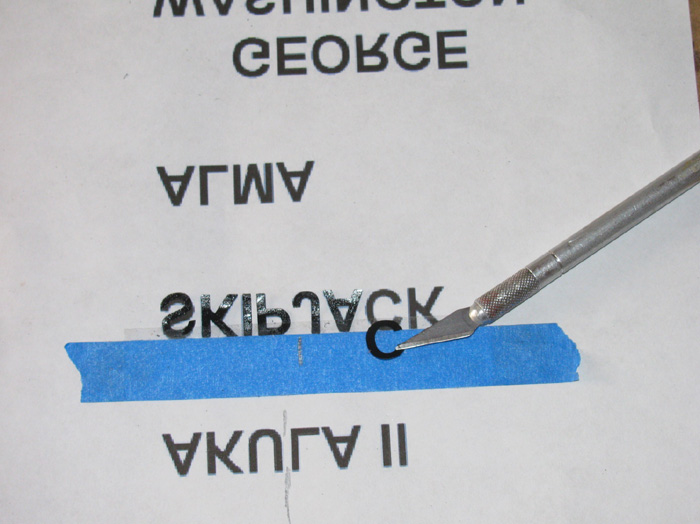
Got the 1/2" letters for the emblems.
So here it I go.
Here I have done the ALMA and the Akula II and I am working on the Skipjack.
The process.
1. On the aluminum plate I put a tape baseline to line up the letter
bottoms. (lower right plate)
On the left, I put a length of clear tape on a piece of blue tape leaving
only 3/16" of clear tape showing.
I placed the tapes on the reverse printed names, lining up the bottom
of the work. (SKIPJACK)
This leaves the clear tape sticking up 3/16" up on to the letters without
eh sticky part up.
Here, I have used the Exacto knife to lift and place the letters on
by using the printed letters as guide, I set the letter on and move it
in to place.
When in place, I press down on the letter where it meets the clear
tape.
Look closely at the left side of the tape and you can see the clear
tape.
Once all the letters are on the clear tape, I carefully lift the letters
up and move to the plate.
The sticky part of the clear is facing up and the sticky part of the
blue tape is facing down.
But the clear tape covers all but the end of the blue tape.
There is a center mark on the tape on the plate and a center mark on
the letter tape.
Line them up and press down on the letters lightly.
Just enough to get the blue tape off.
Then I can with the exacto knife, straighten the letters as needed
and press them down to stay.
With all the letters in pace, carefully remove the blue tape holding
each letters as it come to removing the tape.
All four plates.
Next step is, I put a couple of letters on a small test piece of aluminum.
I will use this to test the clear coat.
I will let it cure over night and then if all goes well, I will clear
coat the emblems.
=====================
Another badge project.
I live in the desert and dust can be a BIG problem.
Example:
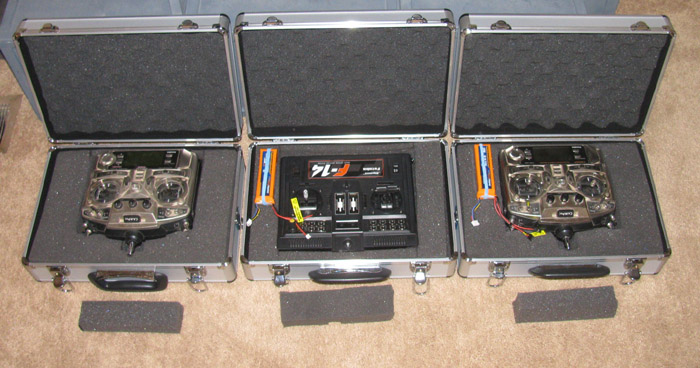
Transmitters. I have a few and they get really dust and
I have to do a through cleaning every time I want to use them.
The ones I use most, sit on the shelf with a towel over
them to help reduce the dust.
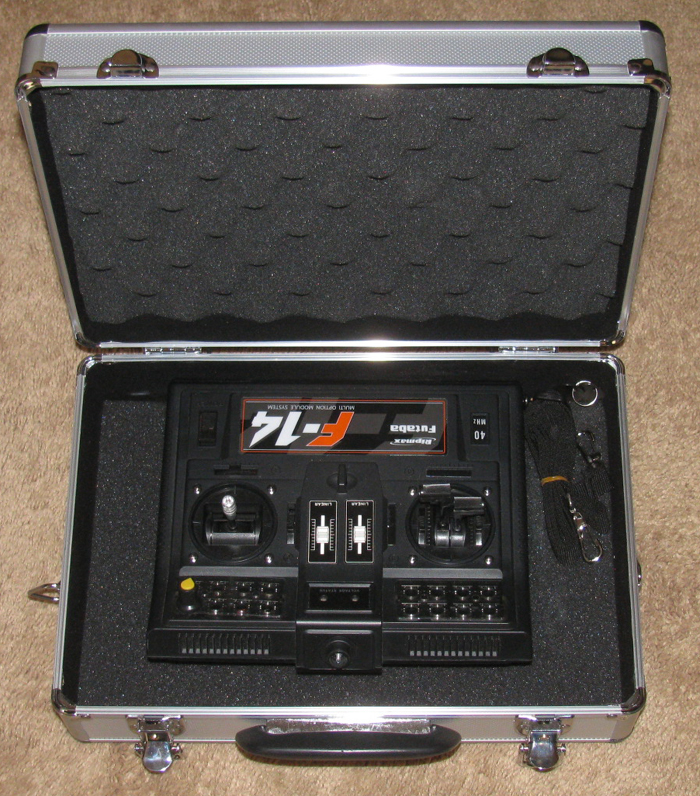
Finally decided to buy some aluminum cases for the Tx(s)...some of them
anyway.
Here is the Tx for the Akula II in the case.
F-14. Using it to show what I am doing because it is the largest of
my Tx and it fits fine in this case.
I still need to cut the foam to go around the Tx and make a spot for
the extra battery.
Was in the shop this morning and cut the boat shapes out of the 1/16"
plastic.
2 for each boat to give the 3D look.
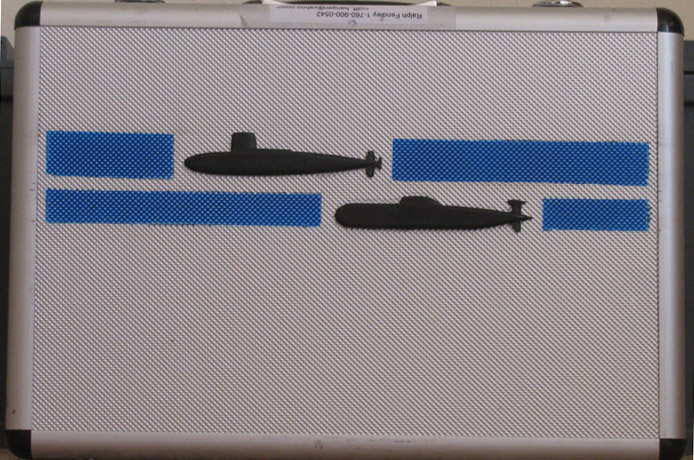
These badges are smaller than the ones on the transportation boxes.
Those are 6" long and these are 4" long.
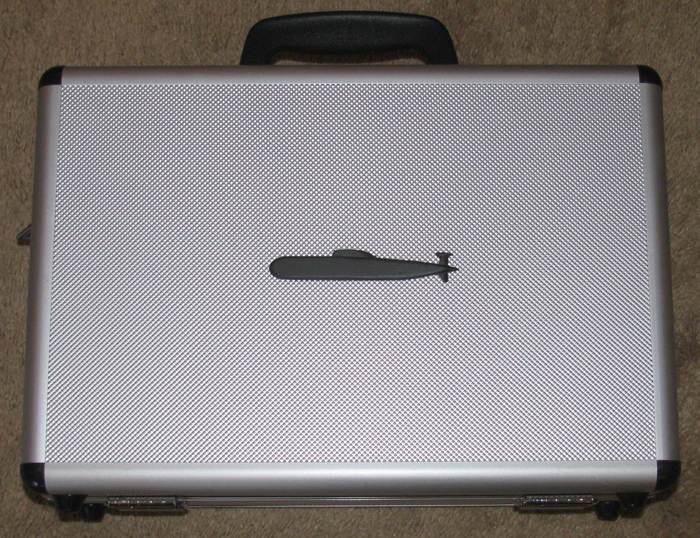
The Tx for the Akula II only runs the Akula II so the case gets 1 badge.
My Futaba 9CAP are programmable and can run many models once I figure
out how it does that.
But I have 1 of these Tx programed for my Skipjack and my George Washington.
So, this case will get 2 badges.
I am not sure if I will mount the badges directly to the cases of use
an aluminum back plate to give the badges background borders.
Like on the transportation boxes.
-------------------------
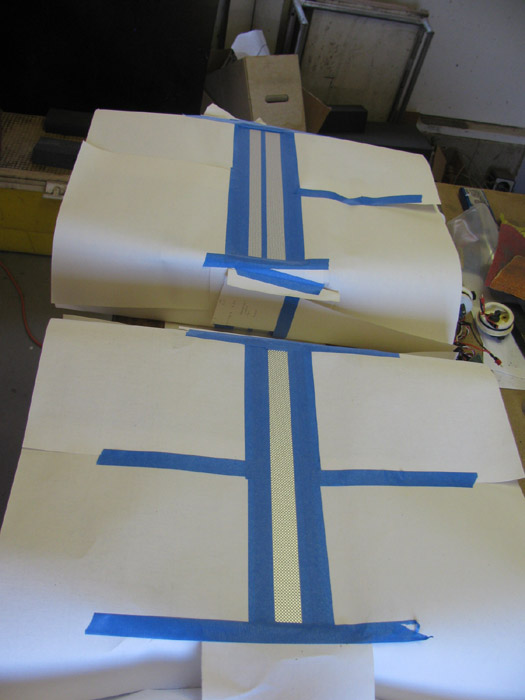
Preparing the cases for paint.
Then taping them off.
First coat on the back.
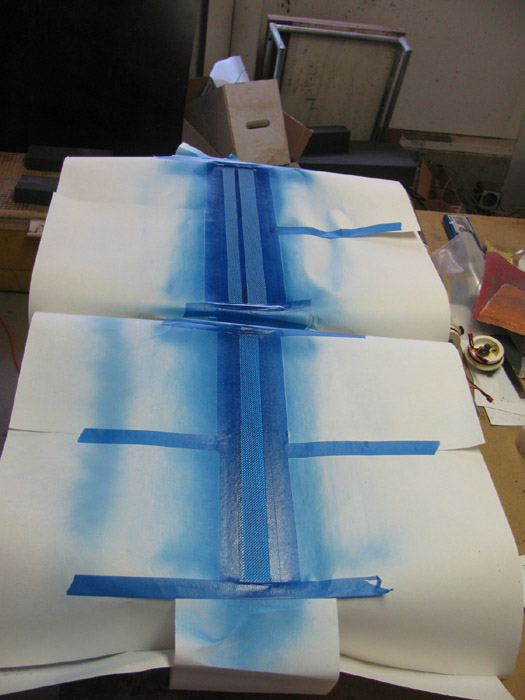
First coat on the front.
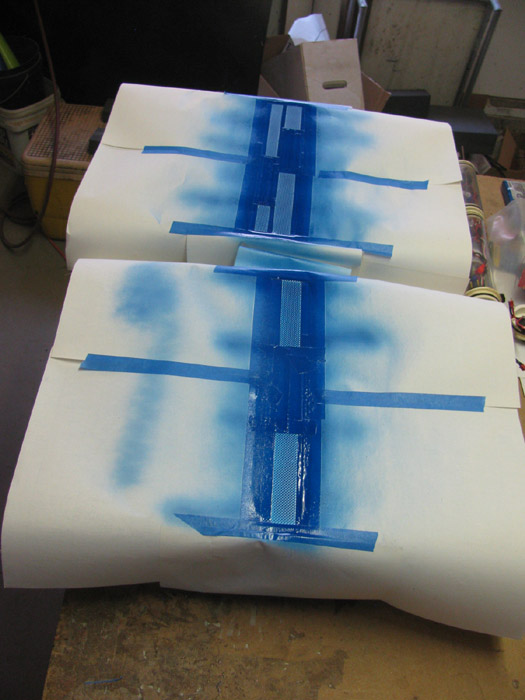
Tape removed.
The aluminum is textured and the paint did get under the tape in the
dimples.
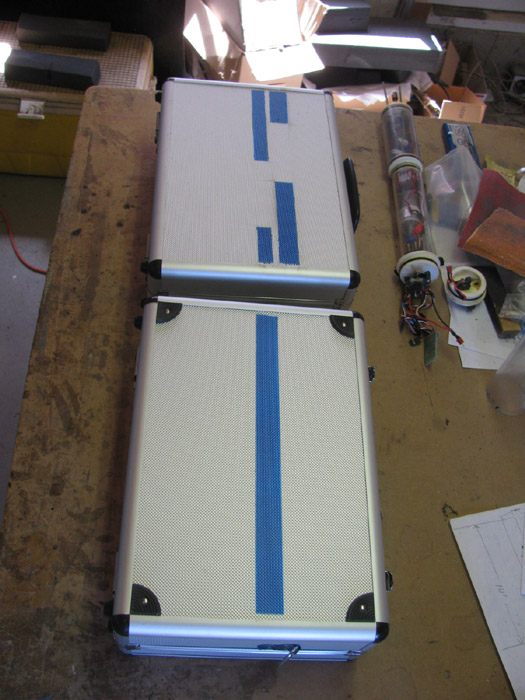
Laying out the badges on the fronts.
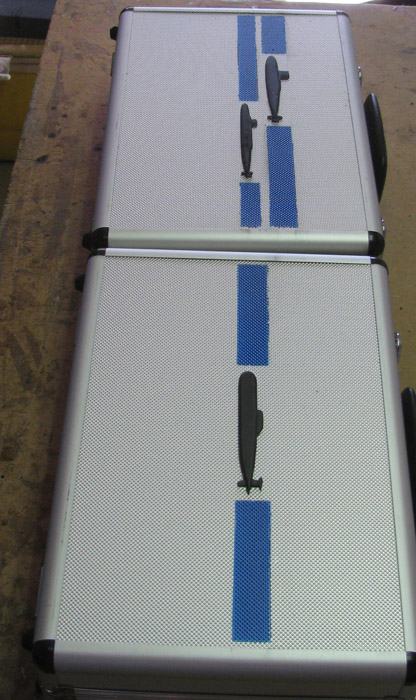
The Akula II badge mounted.
The Skipjack and GW mounted.
Up close the paint can be seen in the dimples.
I took my exacto knife and I can get the paint out of the low spots.
The paint is still soft so I will wait until it has a chance to cure
a couple of days.
The backs have a solid stripe matching the front stripe(s).
I will be able to tell what is in the case from either side.
Modified the Skipjack and changed radios.
Needed to change badge on Tx cases.
Remove the George Washington and put the Akula on.
Don't want to be going to the lake and have the wrong Tx.
============
Went out to the shop to check on something and checked the cases while
there.
Of course, I could not stand the lines where the paint went under the
tape in the dimples.
Thought about it for a few seconds.
Grabbed a sheet of paper.
I have lots of papers from old business records. (Using papers from
over 25 years ago. Do you think the IRS will care. I have digital records
as well)
Looking down the painted lines, I can see where the paint was past where
the tape should have stopped it.
I lined up the edge of the paper with the visible tape line and then
with a stainless steel brush, I brushed back and forth following the edge
of the paper.
The the soft stainless brush cut right through the soft paint removing
the paint from the bottom of the dimples.
The lines look much straighter.
Not blurred as before.
I continued doing this until I think I got all the lines cleaned up.
If there is more, I will get that in the next few days.
Here are the two cases in the house next to the boat transportation
boxes.
Not quite what I had in my mind's eye but, I do like it.
I think the blue is not dark enough but it is transparent so I can
see the aluminum texture under the paint.
The foam blocks I ordered arrived at the post office today.
Did the measuring for the cuts and it turned out that almost all cuts
where straight lines and square.
Took about 20 minutes to cut for 3 cases.
Also, I only needed to make the bottom pieces.
The tops where not needed.
Just small blocks to put a little pressure on the radio fronts where
the radios were flat.
The pressure blocks are sitting in front of the cases.
The ones with extra batteries are the painted cases.
|