| May 1, 2021 the rescue barge was in the water for the 2nd and 3rd time.
Our group gathering in more than a year with a good turn out.
Water was very dirty and algae was grouping wild.
My first run of the day was to get use to the controls and make some
adjustments.
I reduced the rudder turning from 95 degrees to about 40 degrees.
Made driving the barge so much easier.
About 20 minutes in to my run, Jon's home made sub had a problem.
He was only out about 30 feet.
I get to try my hand at a real rescue.
Went out to the stranded sub and slowly bumped up against it.
Then turned the sub so I could push it to shore.
It only took a few minutes.
Looks like I might raise the forward speed from 30% to 35%.
Maybe not.
At about 45 minutes I took the barge out of the water and put it on
the table.
I decided not to run my Akula II.
Wanted to talk and ask questions of the others there.
About 2.5 hours later, I hear a call for help.
I looked around and Tom was asking for help.
His Walrus was stranded out about 35'.
Will got his tug in the water as I was going out to he the Walrus.
Will's tug and move much faster.
Will pushed on the sub several times but ended up riding up on to the
back deck.
I went back out and maneuvered around the sub until I could push the
sub to shore.
Here is where the speed was noticeable.
Full throttle and it was a slow push.
Got it to shore where Tom reach his boat.
All good.
Second time out and 2 rescues.
May 4th =================================================
Now the observations.
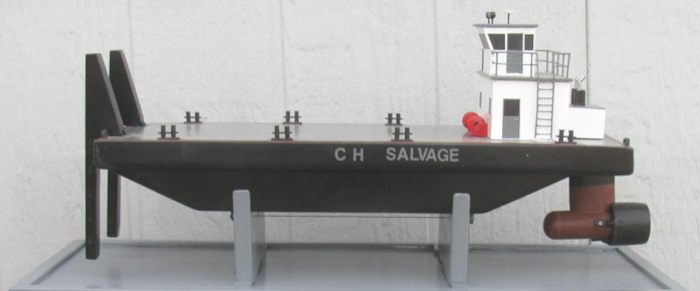
When I first water tested the barge, the stern was very low in the water
because all the electronics and motor are in the back.
I put lead ballast in the bow to bring the barge level.
This gave me 1.25" of free board.
I did not like the look but the barge was operational.
After the day at the pond, I decided I did not like the low look and
would see about raising the free board.
Took the lead ballast weight out of the bow.
Now this is a lot of ballast. (2.5"x7"x1/2") or so
Between 4 an 5 pounds.
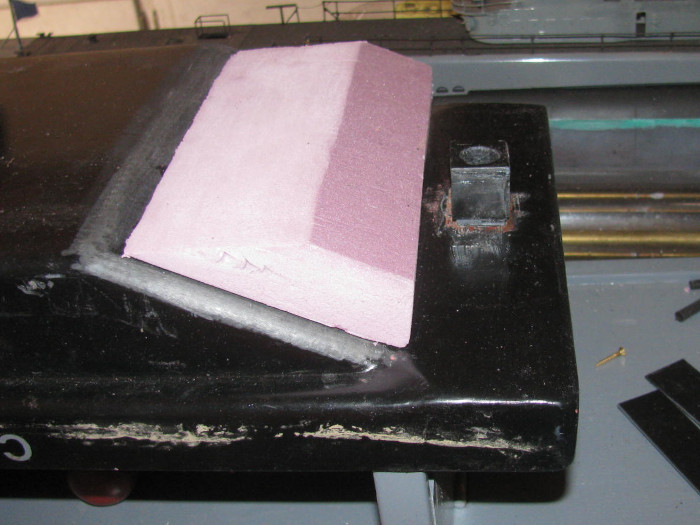
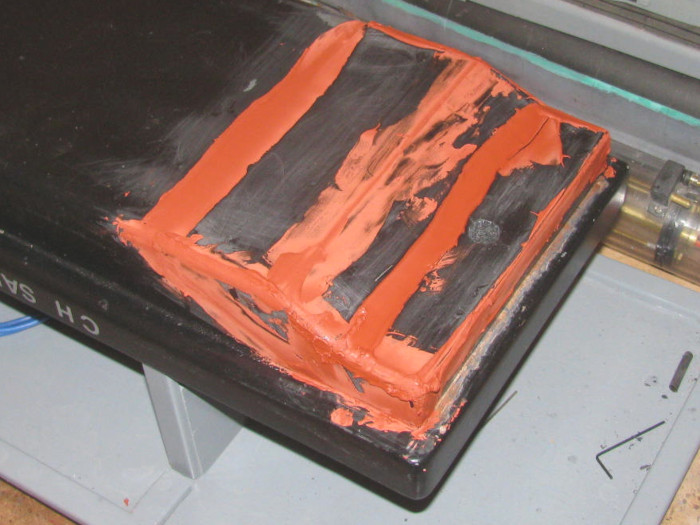
I made a foam block to go under the hull at the stern to extent the
hull shape.
I also made a block of foam to put under the stern block.
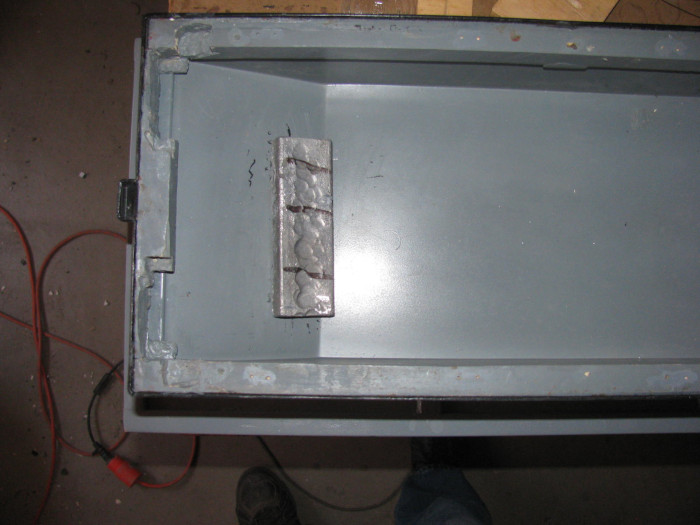
In the water test tank, I put the foam under the stern.
The first block raised the stern but not enough.
That's when I made the second block.
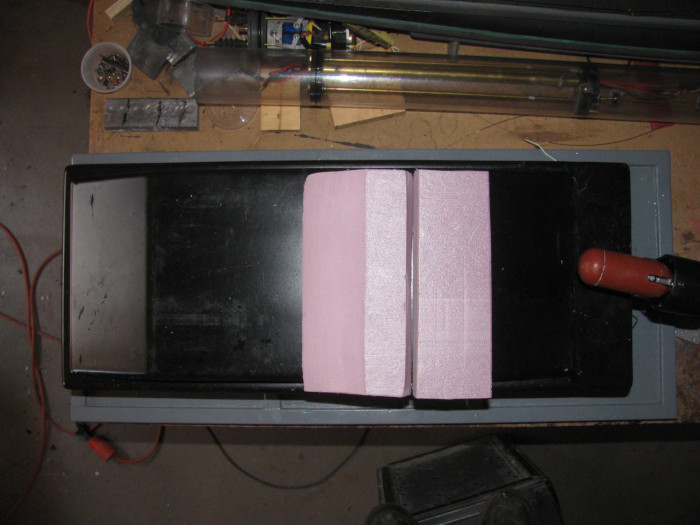
I have to remove the rudder/pod to fit these in place.
Going to cover with sheet plastic or maybe epoxy and cloth.

It needs to be shaped but the stern was now higher than needed.
I have foam to work with.
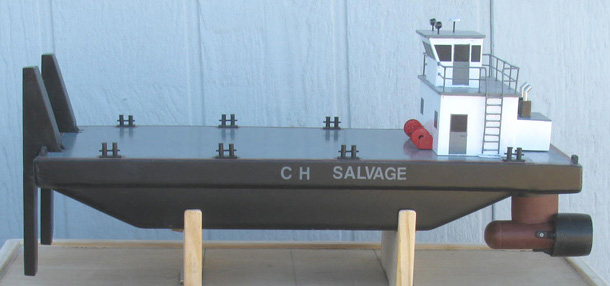
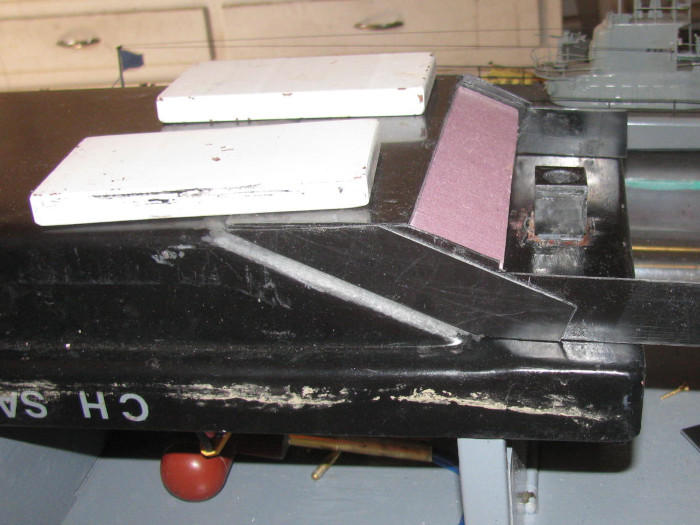
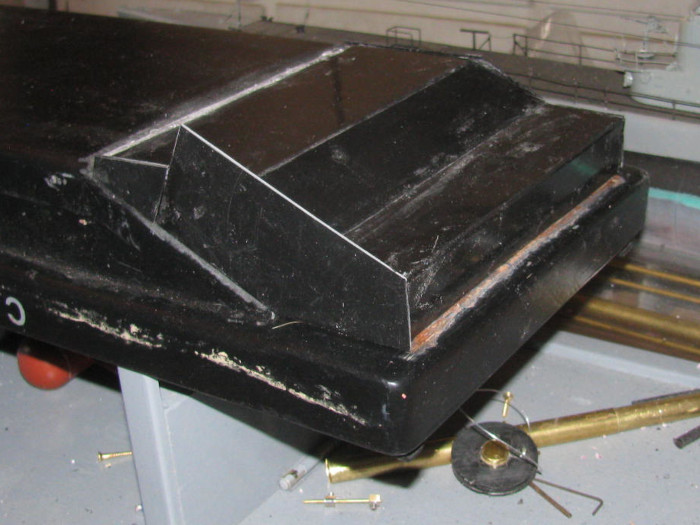
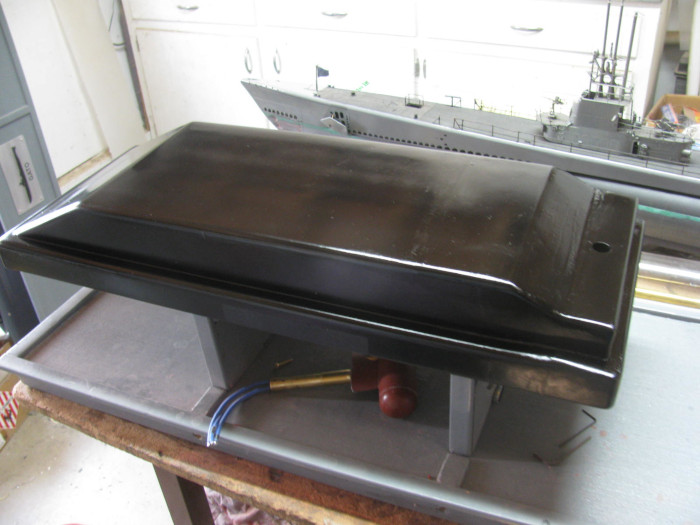
Using this photo, the waterline was at the side shoulder.
Just under the name on the side.
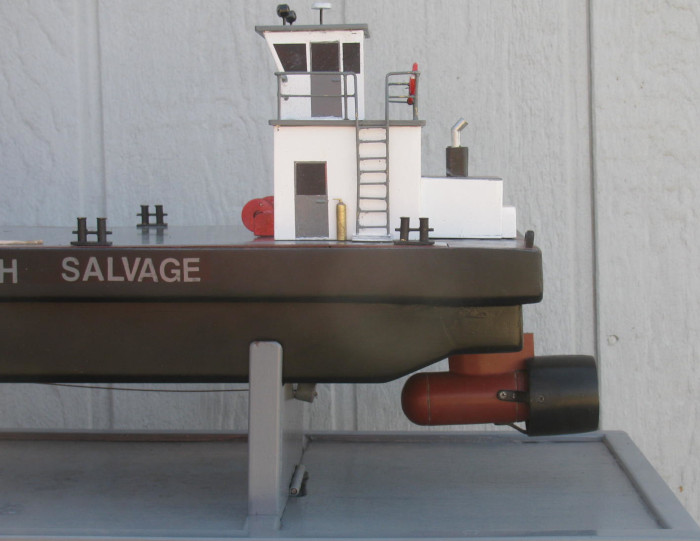
Now the waterline should end up being 3/8" to 1/2" below the shoulder.
About where the shadow is on the rudder.
I had a second issue.
Servo jitters.
I had them both times I went to the lake.
Yesterday and today, I can not get the servos to jitter at all.
I think I know what is causing it and I plan to use the accepted fix.
Get some Ferrite rings and give it a go.
May 5th =================================================
I got a little time in the shop.
Started cutting the plastic sheet pieces to make the new hull bottom,
sides and stern plate.
I glued the two bottom pieces together.
I cut and glues 1 piece for each side.
More to come.
It will take 6 pieces on each side to make this work.
I also cut 1" off the top of the PVC plastic rudder from the rudder
post.
Cut a brass tube space for the rudder post.
So progress was made today.
Next day in the shop will be Friday unless I get home early tomorrow.
May 6th =================================================
A little more than an hour in the shop.
I cut more plastic sheet strips to extend the lower hull.
Got 2 layers on 1 side and 3 layers on the other.
It was difficult to hold the plastic parts against the hull and glue
them.
So I put two 1/2" steel plates on the hull bottom. 3" x 7"
This made the bottom flat and I could push the plastic parts up against
the steel plates.
This gave me a flat bottom.
I could then make the angles plastic parts for the back of the hull.
The glue sets up quickly in this dry warm heat.
While holding the plastic part during the glue set, I thought I might
as well put the first foam block on the hull.
I shaped it yesterday so it was just sitting there in front of my while
holding the plastic parts.
The foam will be inside the plastic parts so not a lot of glue to hold
it in place.
Just so it does not move while I made the plastic hull parts fit.
3 globs of silicone glue.
Slide it under the plastic bottom piece.
Push in tight and let it slide back as the bottom plastic push on it.
This will make putting the side plastic pieces on much easier.
Yesterday I cut and stacked sheet plastic to a thickness of 1".
Today, I sanded the sides to make them square and flat.
Drilled a 9/16" down the center for the rudder post sleeve.
This block will mount on the stern block and then the new plastic stern
piece will glue to it.
The little plastic block will go through the foam block.
I cut the bottom strips for the stern and the angles hull bottom.
They are made by gluing 2 sheet pieces together to get 1/8".
They are clamped to the bench top with metal plates on top of them
to make then straight.
These pieces are 7.25" long and 2" wide, 3.25" wide.
I applied the cement bond with a 3/4" paint bush.
Not that little needle bush in the jar.
So again, things are moving forward.
May 7th =================================================
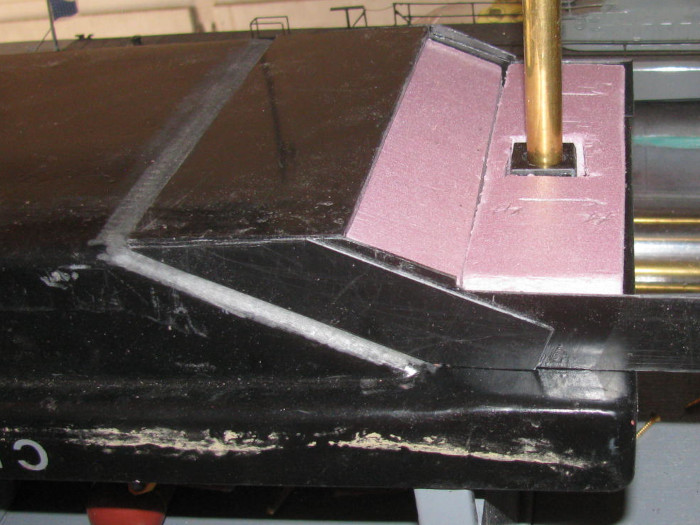
I made the rudder post block.
The rudder post and rudder shim will go through easily so I expect
no binding.
Mounted the block on the bottom of the stern block.
I put a brass tube through the rudder through tube.
I put a shim tube over it so I could see to center the tube in the
block.
Glued it in place.
I then shaped the back stern foam block.
Cut a hole for the rudder post block.

Using the 2 steel ballast blocks I glued the bottom section of the new
stern piece.
This kept the new piece straight with the hull bottom.
I still need to put a couple of layers of plastic sheet on the sides
to bring it out flush with the hull.
Places the brass tubes in the rudder post through tube.
Fit the foam block.
2 drops of silicone glue holds it in place while I work around it.
I have made the 2 pieces that finish the bottom.
They are currently clamped in place while the glue cures.
There are so many clamps I did not take a photo.
The piece that will go across the stern is made but over sized to allow
fitting.
I have some small plastic pieces to make to fill the odd shapes at
the intersection of the steps.
Turns out, I will be home all day tomorrow.
I may get the building done.
There will be finish sanding and shaping before repainting.
While building this extension, I realized, I did not need the foam blocks.
The part is a water tight compartment on it's own.
But, I already made the foam blocks so I put them in.
The plastic touches the foam so there is support.
The rudder post block was not need but I wanted something for the extension
to sit on and bond.
The scum on the hull side is from last Saturday's gathering.
I was thinking when I get the extension done, I might run down to the
lake and see if the water is still dirty.
I could put the barge in the water to get a scum line.
Bring it home and paint clear over it.
May 8th =================================================
I have been in and out of the shop this morning.
This will continue for the afternoon.
I am making parts and enclosing the stern extension.
It is going slow as I blue a piece on, I have to wait for it to cure
to put another piece on.
A big problem has come up.
I have used up all my sheet plastic.
I started several years ago with the 4'x9" 1/16" thick panel.
Yesterday I cut the last of it up in to 1" strips.
It looks like I have a trip to San Fernando, Los Angeles to get more
sheet plastic.
Maybe a 2'x4' piece or 4'x4'.
I looked in the scrap bin and there is nothing big enough to make 1
piece end plates.
I have one more place to look.
I may find pieces big enough on the rejected deck section I made for
the Gotland experiment I never finished.
I was trying to heat shape the long deck on a wood pattern.
It came out okay but had a long twist in it.
Anyway back to the barge.
I am going to keep making the small parts and gluing them on.
In time I should get it done except for the 1 piece side plates. (need
2)
I have cut and glued the 2 pieces to make the stern of the new extension.
I test fit it and Surprise, it fits with out trimming.
I have one clamp in the way of installing the stern plate.
Should be able to remove the clamp in an hour.
More to come.
===========================
The stern plate has been installed.
The port side has been built up.
Trimming and shaping to finish is next after complete cure.

The starboard side is 1 layer short of complete build up.
I have not looked in the bin or for the old Gotland deck.
I might find enough plastic to finish this.
Lots of trimming.
Lots of sanding.
Lots of red glaze.
Then shaping to match original hull.
The rudder post hole needs to be drilled out.
I think there is only 2 layers of plastic there now.
Found enough plastic scarap to finish the side buildup.
May 9th =================================================
In the shop this afternoon.
This is what I got done in about 1 hour 45 minutes.
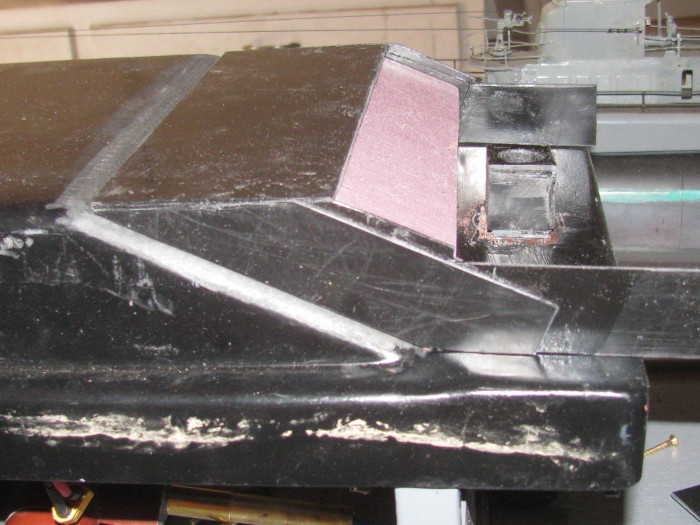
I trimmed all the excess plastic off.
Started with Dremel 1/2" sanding drum to remove all the plastic sticking
up from the hull.
Large cross cut file to get the edges flat with the hull and rounded
off the corners.
Cleaned up the cross cut mars with a small heavy cut jeweler file.
The with the sanding drum and a sanding block with 100 paper (well
used) I smoothed all the edges and got the rounded edges to match the hull.
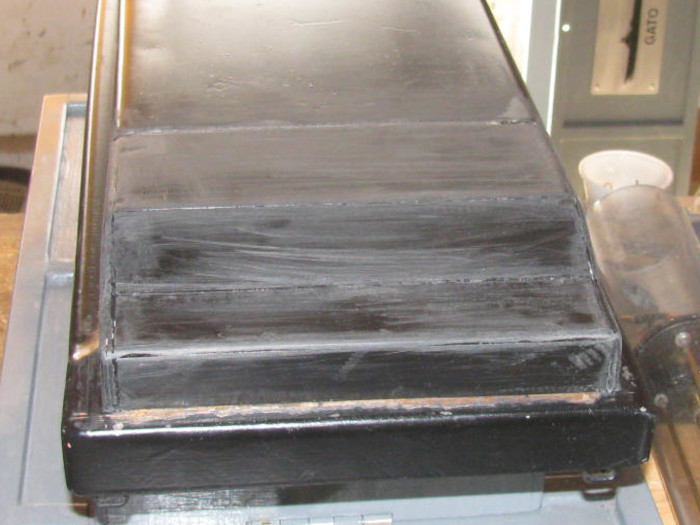
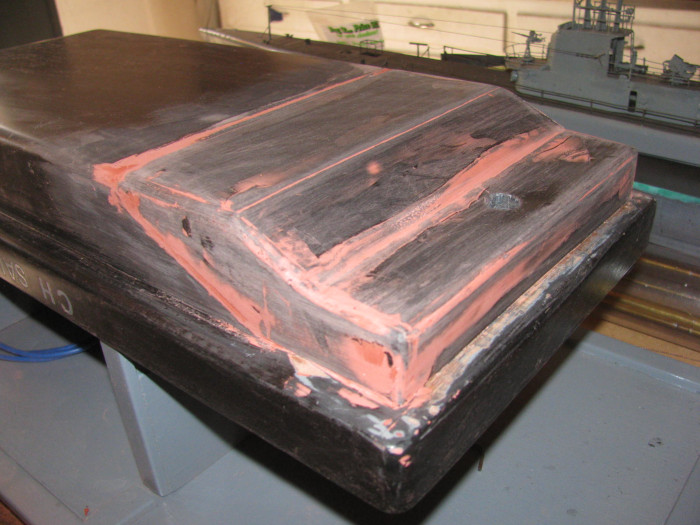
View from the back.
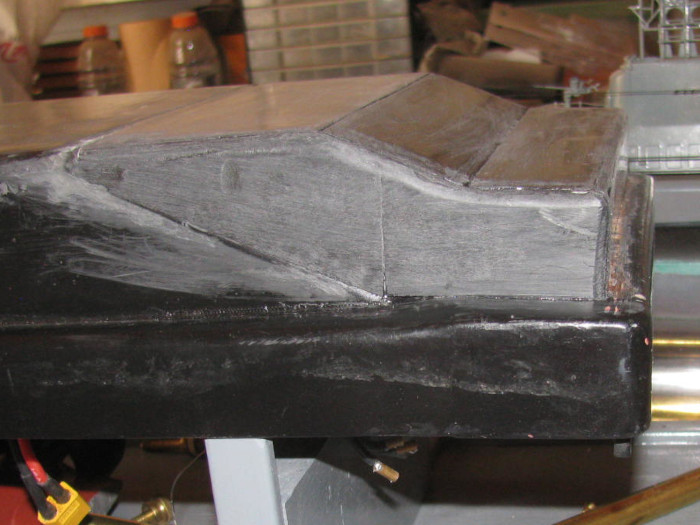
View from the side.
Drilled, files and knife cut the rudder post hole.
Fitted the rudder to make sure it would move smoothly.
I put liberal plastic cement on all the joints.
Sanded smooth when dry.
Cleaned off the hull and made sure to clean the loose joints with 100
psi air.
Filled all the joint seams with red glaze.
I will sand tomorrow.
Then apply more glaze to make the rounded con cave edge. (second joint
from stern going left)
Repainting can not be far off.
May 10th =================================================
I have sanded the first glaze coat.
I see some small areas that need more attention.
I washed off the dust and will wait for it all to dry completely before
glazing again.
May 11th =================================================
Today was a busy day.
Week and a half ago, my septic tank top collapsed.
New tank put in today.
10 am to 3 pm.
During the day I made it in to the shop and put the second red glaze
on the stern modification.
Tomorrow, I hope to sand it again.
I think I will be able to paint the modification after the second sanding.
At least 10 minutes every day on a boat.
Progress happens.
May 12th =================================================
I did a little raking in the back yard to level out the dirt from yesterday's
septic tank install.
This will probably take a week of 1 hour sessions which I plan to do
early in the morning before it gets too hot.
In the shop.
Sanding of the second coat of glaze is done.
I have 3 little spots to glaze and sand.
Glazing done.
I will let cure abut an hour and then sand again.
Maybe a first tack coat of black hull paint today.
==================
As always, after sanding and wiping clean, there are more small spots
to glaze.
==================
Sanded some more and see the small spots are gone.
Cleaned off the hull.
Washed the hull with wet rag.
I got the tack coat of black paint on the hull.
The brown on the right side of hull is a reflection of the bench top.
I went out to the shop and looked.
Tomorrow, I should be able to get 2 more finish coats of black on the
hull.
May 13th =================================================
Light sanding and a coat of black.
Light sanding an hour later and another coat of black.
Will look at it later today and see if I need to do more sanding.
If not, then I can reinstall the rudder/pod.
Put the deck on and I will be finished.
Yea, we will see.
May 15th =================================================
Pulled the tape off the text on the side of the barge.
Did a little rubbing to get the tape edge down.
May need more work but at 3' I can't see the edge.
Fitted the rudder post.
The shim was too long and needed to be cut shorter.
I cut 2 times.
The first was 1/8".
That was not enough.
I need the rudder to go up higher in the rudder tube.
I cut another 1/8" off.
This was close and only needed a little filing to get the pin to go
through the pulley and rudder shaft.
Cleaned up the cut and brass shim tube ends.
Reassembled the rudder, pulley and servo control lines.
Pinned it.
Soldered the 3 motor wires.
Tested the system.
Rudder works and motor works.
I did not plug in the pusher bar servo.
I have not yet gotten the Ferrite rings.
Back to the barge.
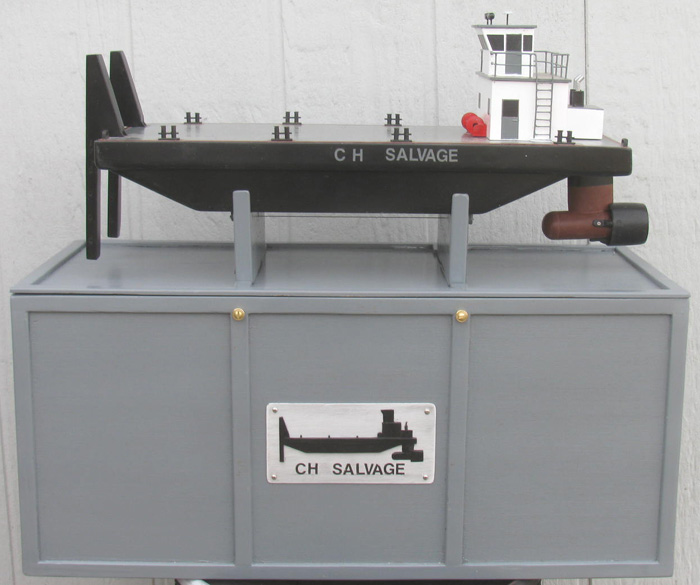
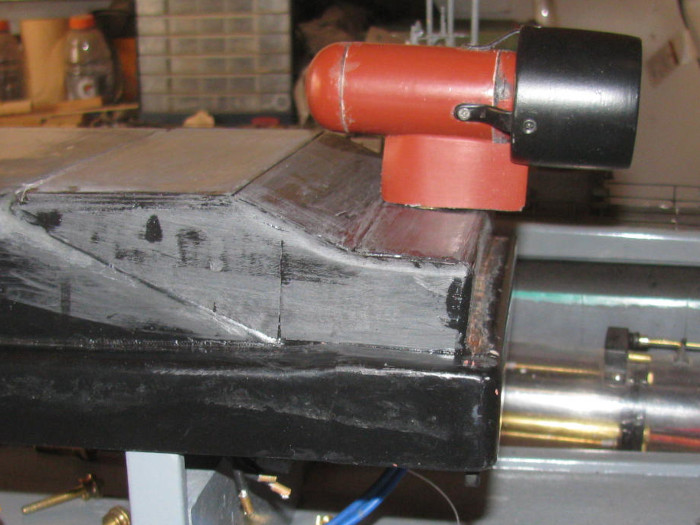
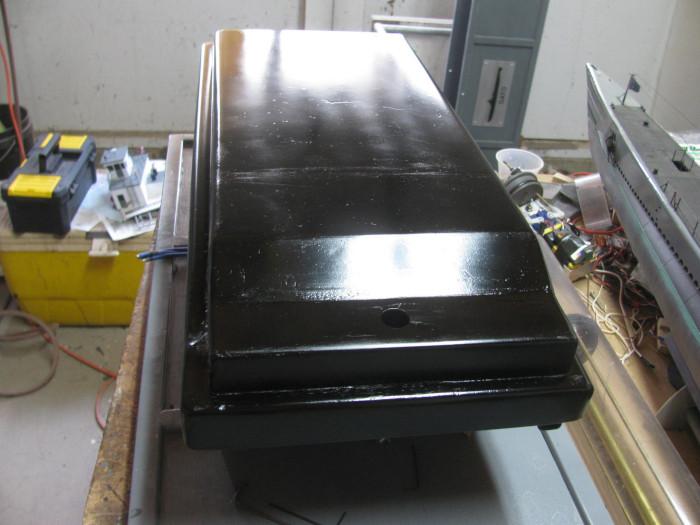
The stern modification is finished.
This is the before photo.
And this is the after photo.
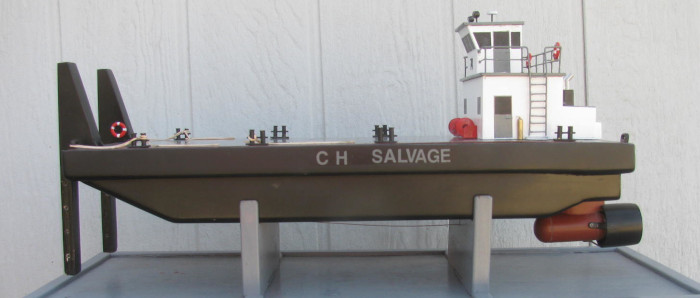
A full inch plus removed from the rudder above the pod.
The stern addition sides are 1" high.
|